Tuesday, May 24, 2016

Awesome jars with vinyl

I absolutely loved the way these came out! I found the jars at the dollar store and they aren't plastic!  Then I vinyled those babies right up! Lol Love it!

Be.You.tiful Mirror

Another mirror

More personalized school spirit gifts

School spirit fundraiser

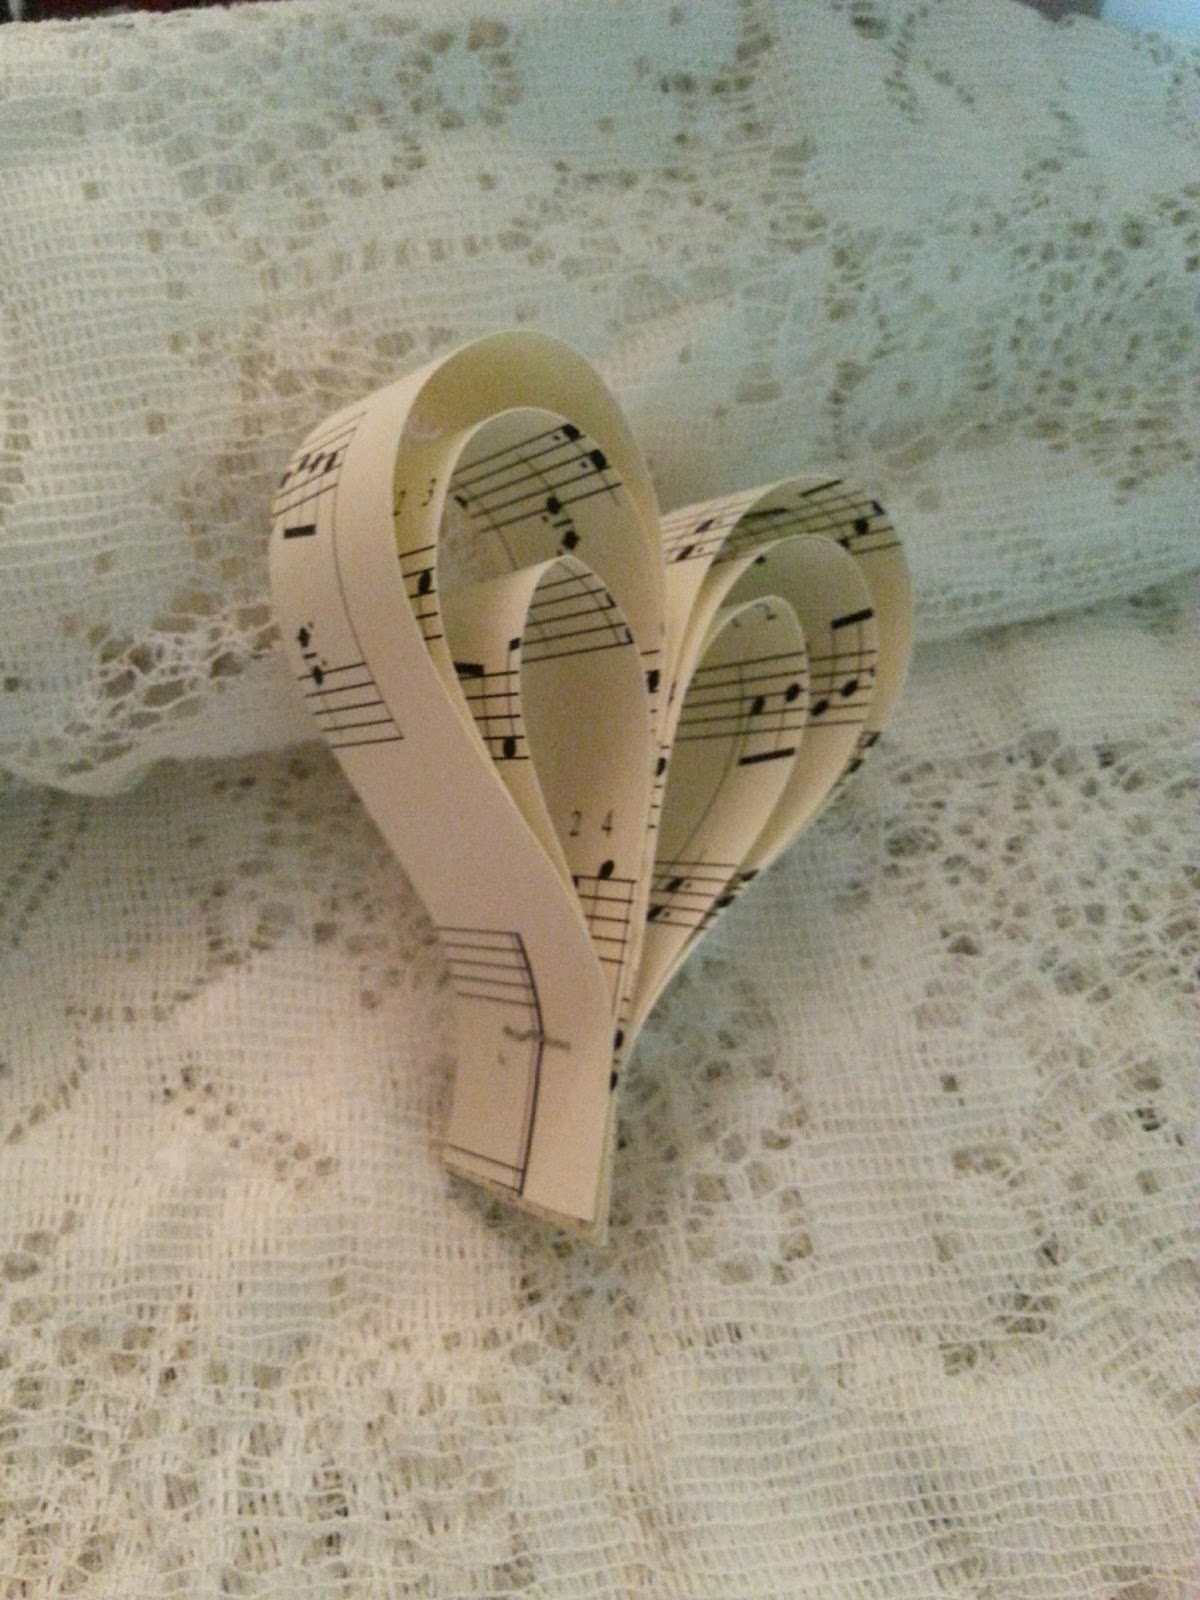
The music department was having their final concert if the year. I made these items to sell to raise funds for the senior scholarship program. They were quite a hit!

Mother's Day card

This design is available in the Silhouette design store. I added a little bling and personalized the inside using a quote I found online as well as a nice graphic.

Gift card holder

I made this gift card holder for my step-daughter's birthday. The pattern can be found in the silhouette design store.

I won a silhouette cameo, Booyah

Never hesitate to enter a contest!  Thank you DiyReady!

Experimenting with etching

I attempted to etch on a black glass frame. It didn't turn out that great but I like it anyway.

More mirrors

Namaste Mirror

Here's a mirror for my Namaste lovers!


Wednesday, May 18, 2016

Canvas Totes for Easter!!!


For Easter this year I decided that I wanted to do something more practical. My girls are getting a little big for Easter but they still enjoy waking up on Easter morning to a nice surprise! So, I decided I would make some canvas totes with everything they would need for our summer trips to the beach.
Here in California summer tends to come a little early so being prepared early is a good idea! Having these totes also teaches the girls responsibility and, hopefully, ensures that they have everything they need in their bag before we leave. Ideally, the first trip is already packed and they take it from there. We've only made one trip to the beach since then but they definitely came in handy, and I may have or not have supplied them with a little more than they actually needed!

Enough with the small talk. Let's get started!

The first tote I designed for my stepdaughter. I asked her what her favorite phrase was and this is what she came up with...


CUZ LOGIC!!! What the heck is "Cuz Logic?!" I asked her AT LEAST three times! Apparently it's a teen thing and I've decided it's best to just stay out of it!


I was very pleased with how it turned out. Here I used a felt like heat transfer material made by Silhouette. It transferred very nicely and was very easy to apply.


                          "Cuz, like, why would I use logic?!"


After making this one I decided it would be better if each child designed their own tote. I wanted it to be more personal and something that would create a memory or bring a smile every time they looked at it. This became quite a feat! Soon I would find out that teens and pre-teens can be very indecisive and/or not very cooperative. They just didn't see the value in what I was doing. However, by the time we were finished, I believe they got it.

My youngest daughter is obsessed with my little pony so I thought I would put some kind of phrase or something on there that relates to my little pony. She, of course, wanted something difficult to find and really wanted a picture, not words! Holy moly! Luckily, I happened to have some printable transfer paper! So, I found the image she wanted and attempted to print and transfer the image. 1) Make sure you are using the right kind of printer for this type of job. My printer is a laser printer and tends to smear on this type of paper so I ruined the first two sheets. 2) Make sure the image you are using doesn't need to be reversed. If you have words, phrases, numbers, etc. you may need to reverse the image depending on what you are doing. I would suggest watching some heat transfer videos on youtube. There are many simple ones that are specific to using the silhouette cameo. Back to my story, I didn't reverse my image so I had to re-do it for a third time! Again, I would highly suggest watching some youtube videos on it. Ultimately, through trial and error, I finally figured it out. Seriously though, watch some videos; you'll save yourself a lot of frustration.

                                                         
My Little Pony Discord phrase...
   "What fun is there in making sense?"


Then I made a stencil for the family guy monkey and for the one with the anchor and helped my other daughter use masking tape and sandpaper to give her bag the look she wanted. Here's a looksie...

                                  The monkey from Family Guy

                                                    Anchored in life!

Friday, January 29, 2016

Treats!

Here's a cute little cookie box I did for the kids' bake sale. The tags were much larger than anticipated.  I seem to be struggling with geometry,  lol.

Christmas Ornaments

The school was raising funds for the music department and wanted to sell Christmas ornaments. The theme was a Victorian Christmas. These were some of the things I used to put ornaments together.

Birthday Card

Made this for my manager for her birthday. The biggest problem I had making this card was gluing down the cut page.  1) It was metallic so it didn't want to stick. 2) I used a glue stick which made quite a mess.  I may have to start buying adhesive backed paper in all colors and go that route (still working on that). I tried to get all fancy and make myself a fancy label (to make it look more professional) but I had issues printing on the silhouette brand foil paper. I think it may be the type of printer I'm using.  I had the same issue when I printed on the gold foil as well.

BABY SHOWER!!!!

So, my daughter just had her first baby. I decided to try my hand at making things from scratch. Everything turned out great but it was very time consuming. I'll have to find a way to do things faster if I ever decide to do more than crafting for fun. Some of these items didn't get made on my cameo but I am finding it easier to design using my cameo than using microsoft word. I find this strange; maybe it's because I'm not very good at word? Anyway...here is a picture of a game that I made. We painted clothespins orange and added black stripes to make tigger tails. I believe I used word for this but printed on my standard card stock that I use for all of my silhouette projects. The frame I picked up at a yard sale. 


The next one was a game I made that I titled, "What's in the Bag?" 


Next we have Bingo, the Price is Right (I didn't have any blank ones left to show so here's a used one left over from the shower) and a Vintage Nursery Rhyme Game. I got the ideas from pinterest and other sources online and started from scratch. I ran out of creme colored paper so I just did the vintage nursery rhyme game on white card stock. It still looked nice. The blue strip, however, was a result of dirty print heads. I'm not a professional and ran short on time. 


Nice artwork by the bingo Player! 

Moving along now...this was my favorite thing of all. It's a baby wish card that each guest filled out for the baby. I used kind of a scallop cut and added little yellow ribbon. SUPER CUTE!!

As a party favor I made these adorable tea bags. I went to the all natural organic store and bought fresh chamomile for tea and bagged it in string tea bags I purchased online. The boxes fit two bags per box. I attached little tags to each bag labeling the type of tea it was (but I forgot to take a picture of the inside). I used my silhouette to cut out the boxes and all of the tags and tied on a honey stick to each one. This was a fun item to make and looked very nice when completed. Doesn't it look great?!


Another thing that I made was a banner but I wasn't able to a photo of it :-( I found a little Whinnie the Pooh book at Goodwill and tore out the pages. Walmart had these adorable tiny wooden clothes pins in their party section and I used those to attach the pages to some yellow ribbon I picked up at the Dollar Tree. It was pretty cool. Here's a photo, intentionally unclear so I don't identify anyone who doesn't want their photo posted online. You can see the banner hanging above their heads.


Just for fun I'll share the food table. Again, I got the ideas from Pinterest. I made cute little wooden signs to label the foods and had the cake special ordered. My talented 13 year old daughter made the cupcakes. What a doll! Overall we were pleased with how things turned out. Could have been more organized but a lot of thought and effort went into it all and it was much appreciated; what more can you ask for? :-)